 |
|
|
|
Ryzen Budget PC Build
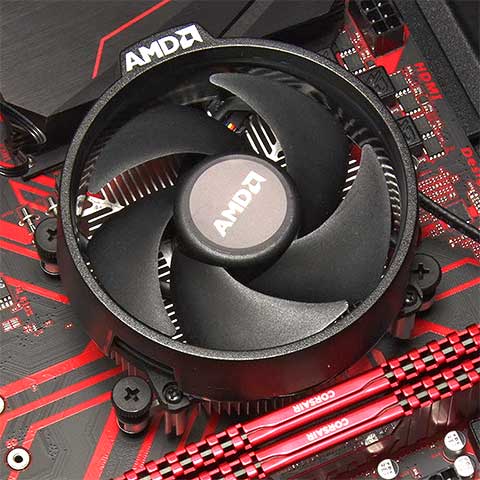
This page supports the six-part ExplainingComputers YouTube series which details building a PC with an AMD Ryzen 3 2200G processor. All of the videos are embedded below, together with details of all components used, and various other comments and information that I did not include in the videos. The first two episodes cover the full specification and construction of a PC that relies on the integrated (onboard) Vega 8 graphics of the 2200G, rather than an external graphics card. The result is a very capable modern computer, able to perform most computing tasks, including lower-end gaming. The total cost for the build was Ł336.35 in the UK, or $354.03 in the US, based on Amazon prices in mid January 2019. Links to all components used, including alternatives, are listed below. And do please note that prices are constantly changing (the cost for the build was actually less by the time the second video uploaded on February 3rd!). PROCESSORThe processor used in this build is a Ryzen 3 2200G, which can be found on Amazon.com here, or Amazon.co.uk here. This an AMD "APU" or "accelerated processing unit", which means that it contains both a CPU, and a GPU, so allowing us to build a PC with fairly decent graphics capabilities without adding a graphics card. Note that most Ryzen chips are not APUs (and so do not include a GPU). However, also in the range of second generation Ryzens is the Ryzen 5 2400G, which is an APU, and so could be used as a more powerful alternative to the 2200G when building a PC with integrated graphics. You can find the Ryzen 5 2400G on Amazon.com here, or on Amazon.co.uk here. MOTHERBOARDThe motherboard used in the build is a Gigabyte B450M GAMING, which can be found on Amazon.co.uk here. At the time of writing there was no US link. :( So you may want to choose one of the below. An alternative motherboard is the GIGABYTE B450M DS3H, which can be found on Amazon.com here, or on Amazon.co.uk here. Another alternative motherboard is the MSI B450M PRO-M2, which is available on Amazon.com here, or Amazon.co.uk here. Basically, you need a motherboard with an AM4 processor socket, and a B450 chipset. Unless, that is, you want to do a much higher end Ryzen build, in which case go for an X470 chipset. Note that all of the above motherboards should be able to be upgraded to work with a third generation Ryzen processor when these are released in the second half of 2019. RAMAll of the above motherboards require DDR4 DIMMs. Used in the build was a Corsair Vengeance LPX 8GB (2x4GB) DDR4 2400 kit, with red head spreaders to match the motherboard. This kit can be found on Amazon.com here, or on Amazon.co.uk here. Note that you can use any 2133, 2400, 266 or 2933 DDR4 DIMMs for your RAM, ideally in a matching pair. And you can fit as much or as little RAM as you like -- from one 4GB module, up to 8GB (ideally in 2 x 4GB modules), 16GB (ideally in 2 x 8GB modules), and even 32GB (ideally in 2 x 16GB modules). Note also that you could use 3200 DDR4 DIMMs, but that Ryzen 3 systems only support this memory speed when overclocked. So personally I would not fit modules faster than 2933. If you want to learn more about RAM and its specification, just watch my video Explaining RAM. CASEThe case used in the videos is a Cooler Master MasterBox Lite 3.1 (Model MCW-L3B3-KANN-01). This can be found on Amazon.co.uk here, or on Amazon.com: here. The latter noted, the MasterBox Lite 3.1 case is currently expensive to obtain from Amazon in the US due to it having to ship internationlly. So for those based in the US I would recommend the Cooler Master MasterBox Q300L. This is a great case, with better cooling than the MasterBox Lite 3.1, if a less exciting front panel. You can find it on Amazon.com here. POWER SUPPPLYThe power supply (PSU) that I use is a Corsair VS550, which is available on Amazon.com here, or on Amazon.co.uk here. Note that any PSU rated at 400W or more will be fine for this build, but that I always like to leave a little headroom for unanticiapted future upgrades. It is always a shame to have to discard a power supply for the sake of an extra 100 watts of output. Note that the online power supply calculator that I use in the video is here. SSDIn the videos I fit a Sandisk PLUS 120GB SSD, which is available on Amazon.com here, or on Amazon.co.uk here. This is a decent, entry level SSD, and if you want to use the PC for a range of tasks including web browsing, office work, e-mail, media playback, and even some lower-end gaming video editing, then a 120GB drive will be fine (I am indeed writing these words on the PC that I use to run my business, and it has a 120GB SSD). However, if you want to install many large games, do significant video editing, download a lot of movies, etc, then you will need a bigger SSD, or an SSD and a hard drive. (For example, for video editing, a 120 or 240/256GB SSD, and a 1TB+ hard drive for video files, would make a good entry-level setup). Note that if you want maximum performance, you could fit an NVMe SSD into this build, which would connect into the M.2 slot on the motherboard, and which would be faster, if more expensive. You can learn about NVMe SSDs in my video: WD Black NVMe SSD. WINDOWS 10 INSTALLATION
The third episode in the series shows how to install Windows 10 on the PC, with the download page for the Windows 10 media creation tool here.
The Gigabyte App Centre web page is here. And web page containing the latest drivers for the Gigabyte B450M GAMING motherboard is here. The PassMark Performance Test 9.0 software shown in the third video is available from PassMark Software. LINUX MINT INSTALLATIONThe fourth episodes in the series explains how to install Linux Mint either instead of Windows 10, or to set up a Windows 10 and Linux Mint dual boot. You can download Linux Mint 19.1 from here.
GRAPHICS CARD UPGRADEThe fifth episode in the series adds a graphics card to significantly improve video editing performance, and to allow most modern games to be played at 1080p resolution. One of the nice things about building a PC based on a Ryzen 3 2200G, or a Ryzen 5 2400G, is that you can complete a working system using the integrated graphics in these processors, and then upgrade with a graphics card at a later date when your budget allows. The graphics card I chose was a, MSI GeForce GTX 1050 Ti GAMING X 4G, which is available on Amazon.com here, or on Amazon.co.uk here (affiliate links). Do note that graphics card prices fluctuate very rapidly indeed, so always shop around to get the best deal. Not also that new cards continue to be released, so you may wish to consider using something like an Nvidia GTX 1660 card (not realeased when I did this build), or a Radeon RX 570 card. The NVIDIA GeForce drivers page for installing drivers is here, while the MSI App can be downloaded from here. LED FRONT FANS AND RGB LIGHTINGThe final episode in the series adds two LED illuminated front case fans, and an internal RGB lighting strip. The components added to the PC in this video video were as follows: Two red Corsair Air Series LED AF120 Quiet Edition fans, which can be found on Amazon.com here or on Amazon.co.uk here. Note that any 12V 120mm fans can be used, and that LED lighting is optional, as is having two fans. Akasa Vegas Magnetic LED Strip Light, which can be found on Amazon.com here or on Amazon.co.uk here. I also used a 4-pin Molex fan adapter and a Zalman FANMATE2 fan speed controller, both of which I happened to have lying around! :) Examples are here and here, but do shop around for the best deal on such components. The support web page for Gigabyte B450M GAMING motherboard (where I downloaded the RGB Fusion app) is at: https://www.gigabyte.com/Motherboard/B450M-GAMING-rev-10#support-dl-driver. And finally, the X-Plane 11 flight simulator website at: https://www.x-plane.com. Note that there is an excellent demo available! Return to: Videos Homepage.
|
 |
|
| ||